Image Map
Showing posts with label 7 Habits. Show all posts

Monday, July 15, 2013

Monday Made It: Alaska Chill Out Spot


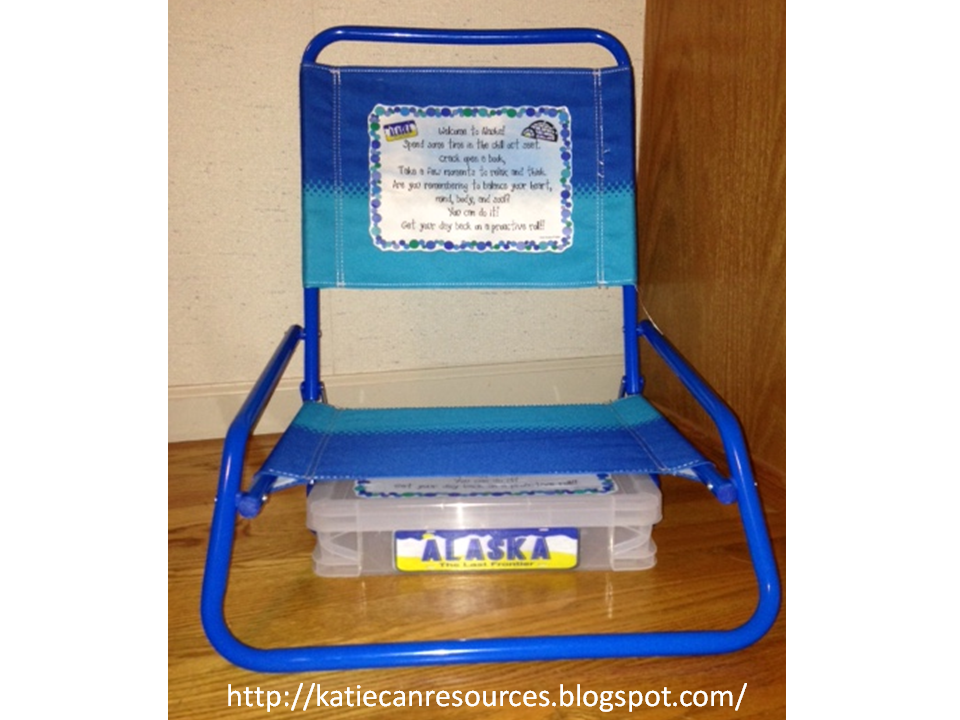
Have you ever had a student that just needed a moment to “chill out” so that he or she can refocus and turn their day around? I most definitely have had several students of this nature. I saw a post from Made In The Shade In Second Grade about an Alaska Chill Out Spot where she sends her kids when they need a moment to regroup. I took the idea and gave it my own personal twist.

I work at a school that teaches our students the 7 Habits so I knew I wanted to incorporate the Habits into some sort of a chill out spot. As a result I came up with a short poem which I printed on a sheet of dark t-shirt iron-on paper. I then ironed the poem onto a beach chair that I got really cheap at Target.
 

Next I printed another copy of the poem on paper and Mod Podged it onto the top of a container. This container will be stored underneath my Alaska Chill Out Spot chair. Inside of the box I will keep books that students can read while they chill out and regroup. All of the books will be books we have read together as a class and discussed how the 7 Habits are exemplified throughout the books.
 
 
Do you like my version of the Alaska Chill Out Spot? Hop on over to my Katie Can Resources TpT store and download it as a FREEBIE! J


Many thanks to Tara over at 4th Grade Frolics for allowing me to link up with her again for her Monday Made It. Take a few minutes to check out what other fabulous bloggers have made!


Monday, June 24, 2013

7 Habits Clip Chart

This past year the entire staff at my school underwent training in the 7 Habits. We began to implement the teachings of the 7 Habits in various areas throughout the school. One of the main things that the administrators and staff at my school are looking forward to is seeing how students can take charge of their behaviors and choices. Many of the K-3 classrooms use a clip chart similar to the one designed by Christina Bainbridge. However, we were looking for a means to tie in the 7 Habits with our behavior system. My coworker, Abby, of Third Grade Bookworm came up with the perfect solution when she had her creative juices flowing and designed the 7 Habits Clip Chart.
  
Today my Second Grade teammates and I gathered to use Christina Bainbridge’s colorful clip chart idea and combine it with the 7 Habits Clip Chart sayings that Abby penned. Here is what our final product looked like:


Before the Second Grade team gathered, I got all of the supplies. The plywood was purchased from Lowes where one of their employees kindly cut the plywood into 14 x 69 inch pieces. Here is a list of all the supplies we used to create the 7 Habits Clip Charts:
·        14 x 69 inch piece of plywood (1 per clip chart)
·        Primer
·        Spray paint (pink, purple, blue, green, yellow, orange, red)
·        Painter’s tape
·        7 Habits Clip Chart FREEBIE from Third Grade Bookworm’s store on Teachers Pay Teachers
·        Pencil
·        Tape measure or ruler
·        Mod Podge
·        Sponge brushes
·        Scrap paper
·        Drop cloths
·        Sand paper
Before we primed the plywood, we used sanders to get rid of splinters and smooth out the edges of the wood. Once the sanding was completed, we primed each piece of plywood. Then we had to wait for the primer to dry, so we took a break and caught up on what has been happening thus far this summer.

Once the primer was dry, we used tape measures and rulers to measure the various sections. The pink, purple, blue, yellow, orange and red sections are each 9 ½ inches x 14 inches. The green section is 12 inches x 14 inches.

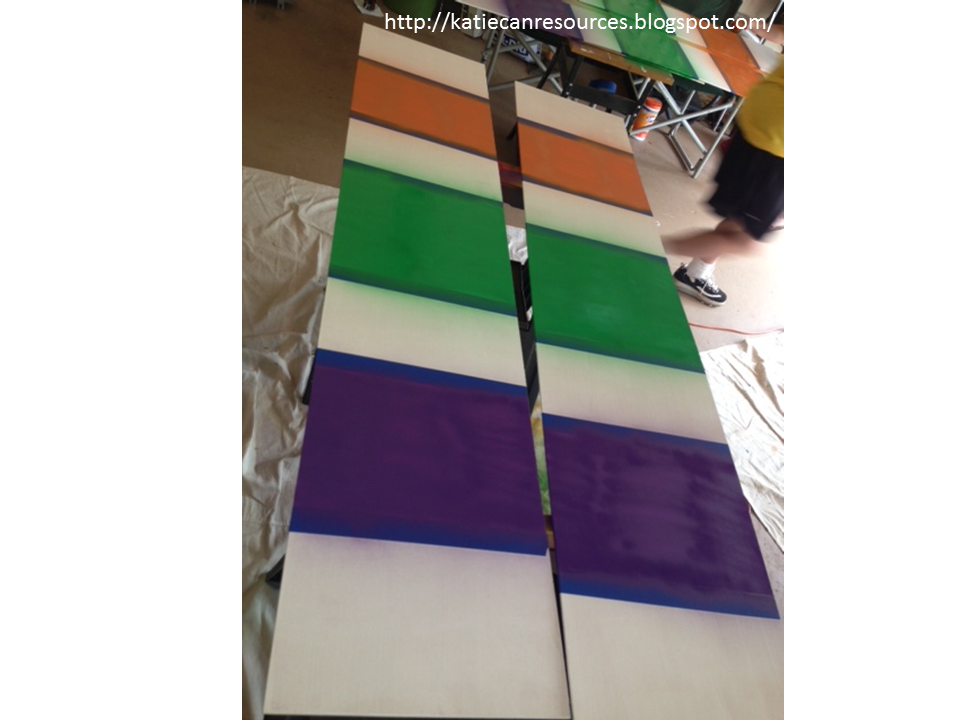
Once the sections were measured, we used tape on the outside of the lines that designate green, purple and orange. Then we proceeded to paint each of those sections. Once those colors were on, we once again had to allow time for the paint to dry. At this point in the day, that meant we ordered lunch and enjoyed some more socializing.

After lunch, we removed the tape and went to work taping off the other sections. So as to not ruin the sections we previously painted, we covered the painted sections with paper and then used painters tape to affix it. Once all sections were taped off we painted the pink, blue, yellow and red sections. While we waited for the paint to dry we trimmed the white off of the 7 Habits Clip Chart FREEBIES.

Finally, when all the paint was dry we removed the tape and paper. Then we used Mod Podge to affix the 7 Habits Clip Chart FREEBIE to each the clip chart making sure the colors matched. For example, the green polka dot border went on the green section of the clip chart. We found that applying Mod Podge to the clip chart, then placing the clip chart saying on top of it and following that with another coat of Mod Podge helped to securely affix the sayings.

I learned two things when we created the 7 Habits Clip Charts. First, I learned that spray paint may not be the best thing to use, particularly on a humid day. Acrylic paint could have been utilized and would have dried faster than the spray paint. Second, using a small roller in lieu of the sponge brush makes it easier to ensure that the Mod Podge is applied evenly and eliminates most of the air bubbles that might occur.  
Altogether my teammates and I made eight 7 Habits Clip Charts. Since we all split the cost of the materials, it came out to about $10 per clip chart. We are so excited to utilize the 7 Habits Clip Chart in our classrooms this coming school year!


Wednesday, May 22, 2013

Three Days of Synergy Results in a 7 Habits Tree

The entire staff at Fair Oaks has spent the past year being trained in the 7 Habits and beginning to implement them within our school. Since our school name derives from the oak tree, we thought it only fitting that we use an oak tree as a teaching tool and visual representation of the habits. This is the story of how staff members utilized Habit 6, synergize, to bring to life a 7 Habits tree on our school’s campus.


Day 1

We are always looking for ways to recycle and repurpose materials. We had a vision of the 7 Habits tree grabbing students’ attention with colorful signs that appear almost like on a tree fort.  Therefore we decided to repurpose some wood pallets that were donated to us. It took some serious synergy to break apart the pallets. Protective eye gear was worn as we employed crowbars to break down the pallets.


Once the boards were disassembled, we utilized hammers to knock out the remaining nails.


Our next step was to use sealer to prepare the wood. We made sure to seal both the front and back of each piece of wood as well as the sides. Rollers were able to quickly get this job done. While the sealant was drying, we utilized a Cricket to cut out the letters to spell out each of the habits. We used thick pieces of cardstock for the letters.

Once the letters spelling each habit were cut out, we used small tubes of painter’s tape to affix the letters to the sealed pieces of wood. We choose to not line up the letters in a straight line; rather, we decided to put the letter on a bit haphazardly so that they looked a bit more like a child might write them. Next, we spray painted the tops and sides of each piece of wood. When we applied the spray paint, we found that it was important to make sure we were spraying directly down on top of the letters we had affixed to the wood so that we could outline the letters that spelled out the habits.


Day 2

With the signs naming each habit complete, we wanted to tie in the sayings that correspond to each habit. For example, Habit 3, Put First Things First, corresponds with the catch phrase Think First, Then Play.

We chose to use 3 large pots and 4 smaller pots. The pots were then created in much the same way we made the signs. First we applied sealer on the whole outside as well as several inches inside each pot. While the sealer on the pots was drying, we again used the Cricket to cut out the letters to each catch phrase.

Once the sealer was dry, we utilized painter’s tape to affix the catch phrases to each pot. Next, we used the same spray paint we made the habits signs with to paint each pot. We made sure that each catch phrase was done in the color that coordinated with the habits signs we made on a previous day.

Day 3

The third day was all about the installation of the signs and the planting and arranging of the pots. Prior to installing the habits signs on the oak tree we had to trim a few branches. We ended up using an axe to cut the branches, but in hindsight a branch cutter would have made the tree trimming a bit easier. Once the branches were removed or cut back, we then began by installing the first three habits. We affixed those three habits to two pieces of wood that we painted brown. Then we dug two shallow holes, sunk the brown pieces of wood in them and proceed to pound the dirt back in around the base so that the first three habits stood upright. When you step back, it appears as if the first three habits are actually in the ground, much like they are in the Franklin Covey representation of the 7 Habits tree.


Our next step was to affix the other five habit signs to the oak tree.


While our 7 Habits oak tree is looking quite nice, we have a few more finishing touches we want to add. One addition will include repurposing plastic bottles to make a Chihuley sculpture reminiscent of the sun which will be hung from the oak tree. The other is creating a sign that simply says “The 7 Habits” which will be hung above the habits signs on the oak tree. This will enable visitors to our school who may not be familiar with the 7 Habits to recognize them and understand what is being shown on our oak tree.